plex setup
We are going to be setting up plex on a bare metal device, this can also be done with GPU passthrough to a Virtal machine if you want to.
Requirements
- One device capable of Running plex (Preferably I5 6th Gen onwards for Quicksync etc) 16GB of Ram, Stand alone boot drive and a stand alone drive for media.
- Fixed IP address, either by reservation or out of your DHCP pool.
- A device capable of SSHing to the server (W10 and above or mac).
- Make sure all disks you want to use are installed and plugged in.
Getting Started
Fire up an ubuntu install
- Start up an ubuntu live CD, either Ubuntu Desktop or Ubuntu Server - Server is preferred as there is less Disk space and RAM used by OS
- When at the installer screen you will want to Select “custom Storage layout”
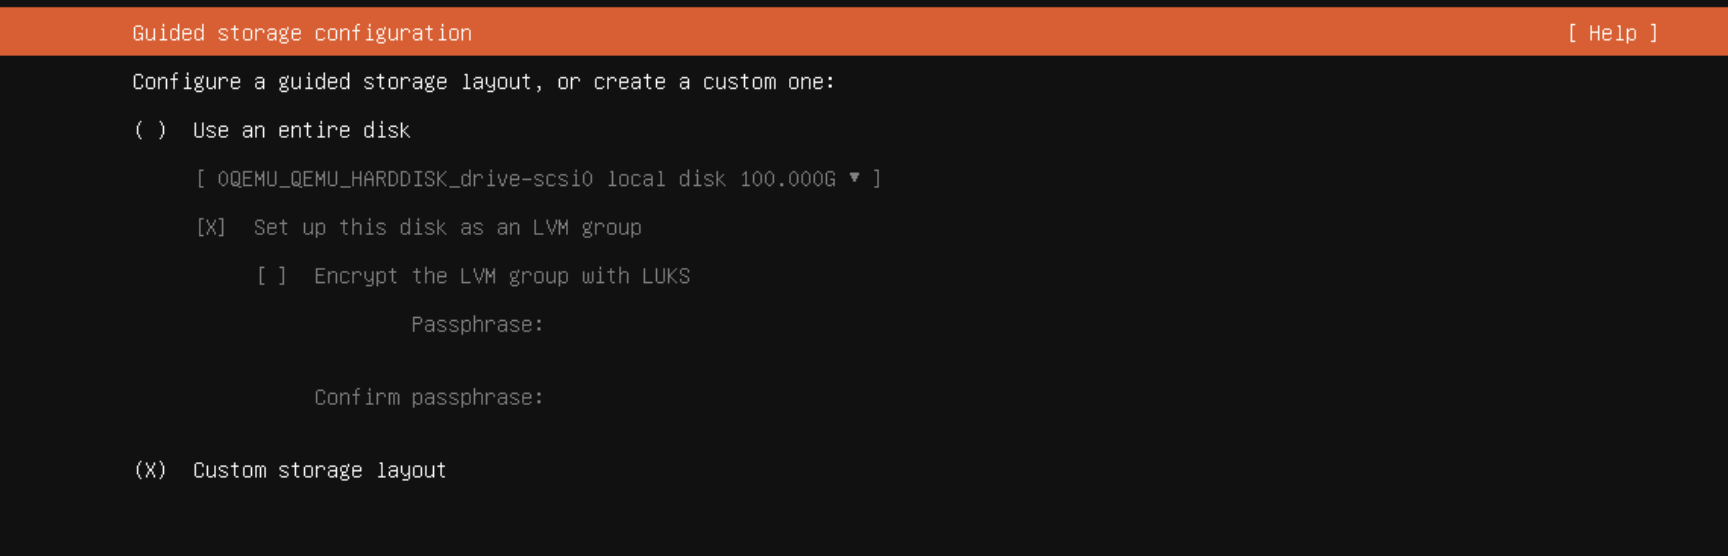
- On the disk you wish to use as OS, scroll to “Free space” and hit return and then “Add GPT partition”, Scroll down and press “Create” - This will create your main OS disk
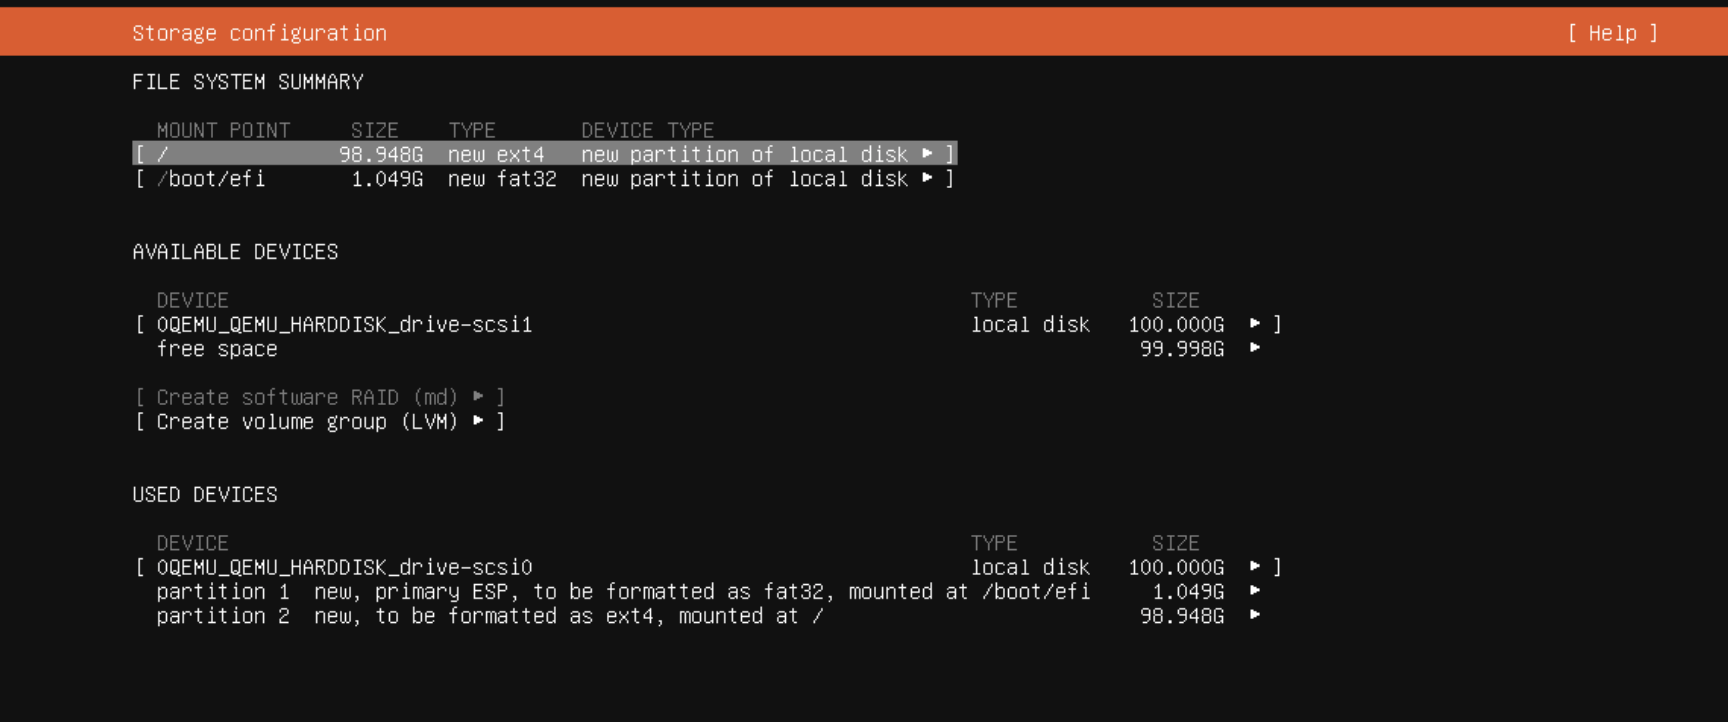
- On the disk you wish to use for media, scroll to “Free Space” and hit Return and then “Add GPT Partition”, scroll down and on the mount point scroll to “other” and type
mnt/mediaand then create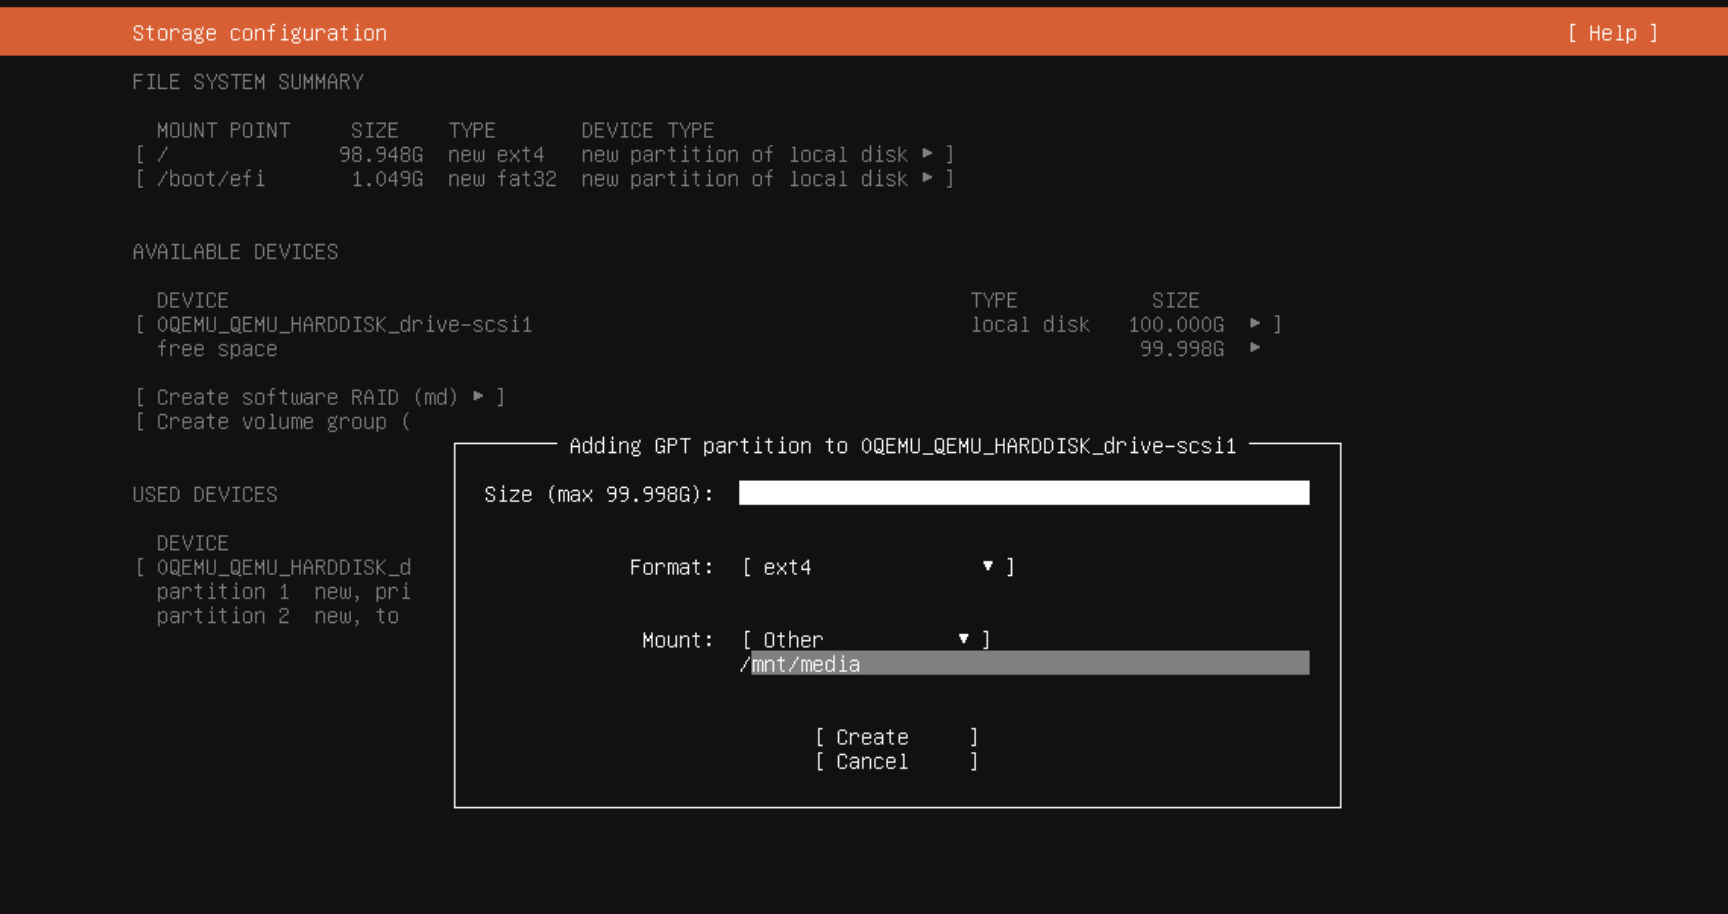
- Your disk layout should look something like this
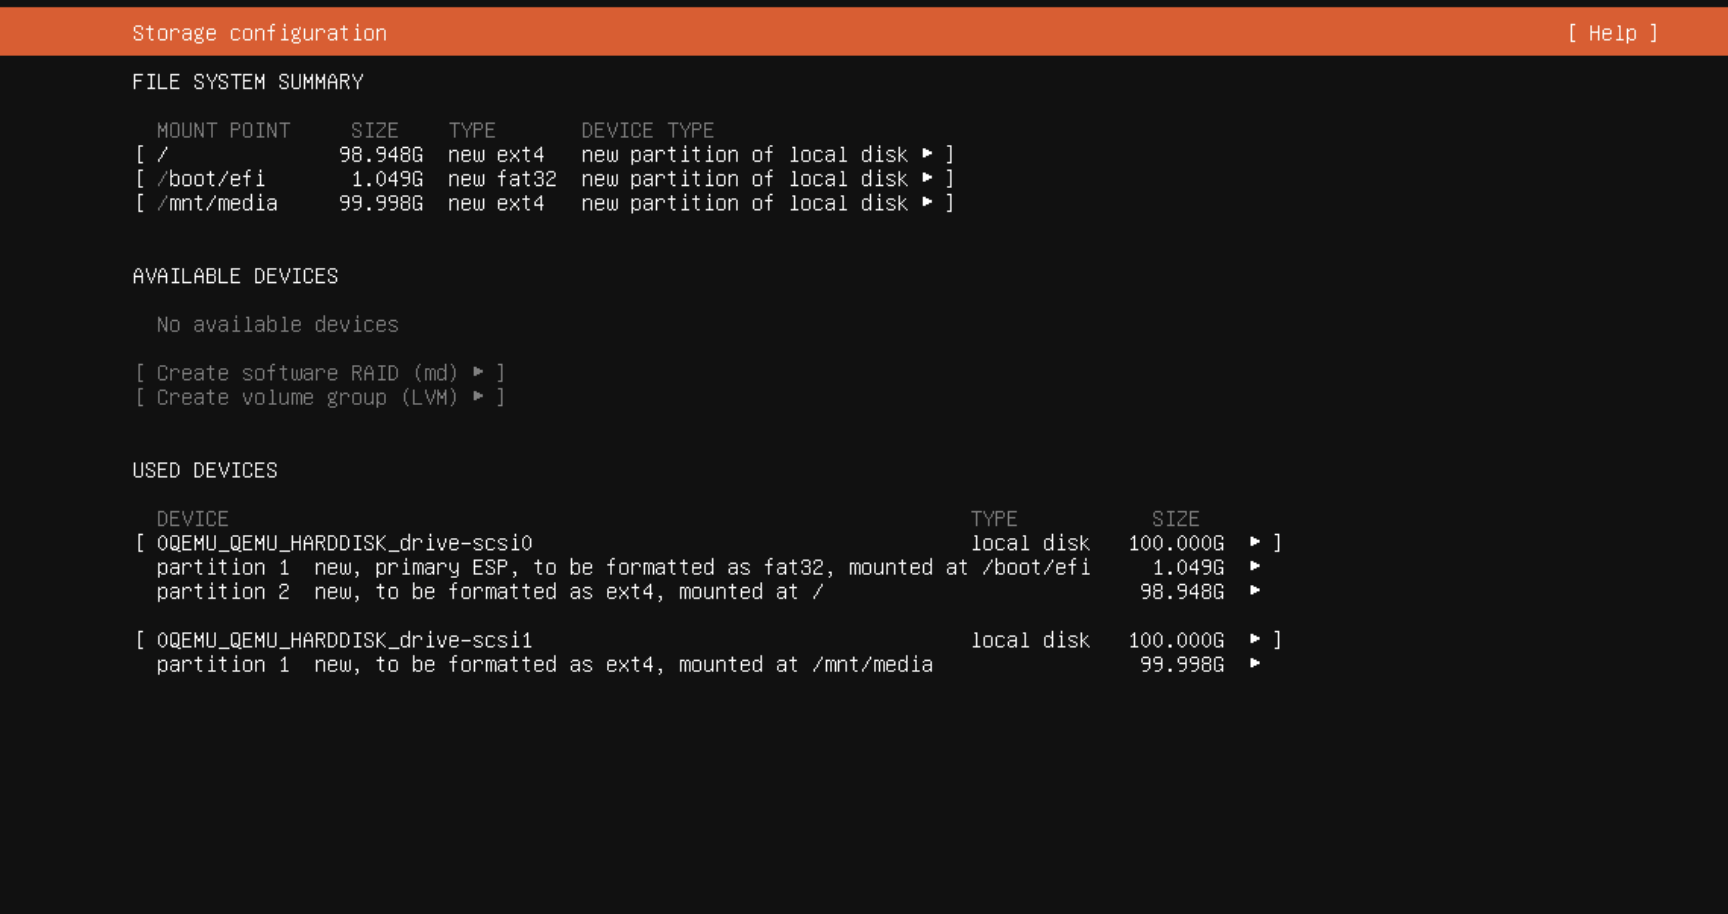
- Hit “Done” and then “continue” you will then be asked to give your server a name and enter usernames and passwords. Skip the ubuntu pro install, and then install OpenSSH Server so we can access later. - Hit done on the next two prompts and start the install
Time to do some updates and create directories
- Once the install is complete, Reboot and remove the CD or USB install media.
- You should now either be at the desktop or at a terminal prompt, depending on what OS you went for.
- Run the following to update apt packages etc..
1
sudo apt update && sudo apt upgrade -y
- Creating some directories for media, We are going to want a directory for each type of media we want plex to ingest. An ideal file tree should look like
1
2
3
4
5
└── /mnt/media/
 ├── TV
 ├── Movies
 ├── Music
 └── Photos
To create all the directories on your media drive, copy and paste each line.
1
2
3
4
sudo mkdir /mnt/media/TV
sudo mkdir /mnt/media/Movies
sudo mkdir /mnt/media/Music
sudo mkdir /mnt/media/Photos
That should be it for the media directories that Plex will want to use.
Folders for Docker and Dockge
As we will be installing docker for some containers that will help us keep plex in check etc. We will want 2 directories in /opt
1
2
sudo mkdir /opt/stacks
sudo mkdir /opt/dockge
Installing Plex
- Install apt transport and curl
sudo apt install apt-transport-https curl - Add the GPG key for Plex
curl https://downloads.plex.tv/plex-keys/PlexSign.key | gpg --dearmor | sudo tee /usr/share/keyrings/plexserver.gpg > /dev/null - Add the Repo for Plex
echo deb [arch=amd64 signed-by=/usr/share/keyrings/plexserver.gpg] https://downloads.plex.tv/repo/deb public main | sudo tee /etc/apt/sources.list.d/plexmediaserver.list - Perform and apt update
sudo apt update - Install plex
sudo apt install plexmediaserver -y - Start Plex
sudo systemctl start plexmediaserver - Enable plex
` sudo systemctl enable plexmediaserver`
Now you can go to server IP on port 32400 and configure plex.
You can stop here if you don’t want to add any further customisations or monitoring to plex.
Installing Docker
- Install apt transport etc.
sudo apt install apt-transport-https ca-certificates curl software-properties-common - Add the GPG key for docker Repo
curl -fsSL https://download.docker.com/linux/ubuntu/gpg | sudo apt-key add - - Add Docker repository
sudo add-apt-repository "deb [arch=amd64] https://download.docker.com/linux/ubuntu focal stable" - Update Apt cache policy
apt-cache policy docker-ce - Install Docker-CE
sudo apt install docker-ce Check docker is running with
sudo docker psanddocker version- Install Docker compose
` sudo apt-get install docker-compose-pluginthen test withdocker compose version`
Now we are going to want to be execute docker commands without issuing sudo
sudo usermod -aG docker ${USER}- To apply, give the machine a quick reboot
sudo rebootAdditional containers for plex quality of life improvements
- Kometa - Manages media, collections etc.
- Tautulli - Monitor and track plex usage
- Dockge - Simple Web UI for docker
- Watchtower - Keep containers up to date
Dockge
We will start by installing Dockge.
Start by changing into the dockge folder you made earlier.
cd /opt/dockgeThen run the following
curl https://raw.githubusercontent.com/louislam/dockge/master/compose.yaml --output compose.yaml
and now rundocker compose up -d
The Server should be online onhttp://SERVER-IP:5001
You can now use this to spin up the rest of the containers.Tautulli
In dockge press “Compose” and then paste the following YAML into the prompt on the right.
1
2
3
4
5
6
7
8
9
10
11
12
13
14
15
version: "3.3"
services:
tautulli:
  container_name: tautulli
  restart: unless-stopped
  volumes:
    - /opt/stacks/tautuilli/config:/config
  environment:
    - PUID=1001
    - PGID=1001
    - TZ=Europe/London #Change to your own timezone
  ports:
    - 8181:8181
  image: ghcr.io/tautulli/tautulli
networks: {}
Press save and start. Tautulli should now be online on
http://SERVER-IP:8181
Kometa
Kometa is a bit fiddly to get up and running 100%
It requires the following from from plex.
- TMDb API Key
- Plex URL and Token
In Dockge hit create and then paste the following:
1
2
3
4
5
6
7
8
9
10
11
12
13
 version: "3.3"
services:
  kometa:
    restart: unless-stopped
    environment:
      - KOMETA_TIMES=01:00,13:00,17:00,05:00,20:00,23:00 #times you want kometa to run
      - TZ=Europe/London # change to your timezome
    stdin_open: true
    tty: true
    volumes:
      - /opt/stacks/kometa/config:/config:rw
    image: kometateam/kometa
networks: {}
Hit save and start, it should start up but error out. - This is to be expected. Stop and invalidate the container.
On your server, change into the following directory cd /opt/stacks/kometa/
you can then download the config template into the folder.
curl -fLvo config/config.yml https://raw.githubusercontent.com/Kometa-Team/Kometa/master/config/config.yml.template
Now, you will want to get your plex token.
1) Login to plex web and then browse to a library item and select “get info” 2) On the media info screen press “View XML” 3) At the End of the url you will see x-plex-token, copy the value out into a notepad or clipboard.
Open up the config file sudo nano config/config.yml
Scroll down until you find the Plex section and paste in the token you took from the browser earlier.
1
2
3
plex:                                           # Can be individually specified per library as well
  url: http://bing.bang.boing                <<< ENTER YOUR PLEX URL HERE
  token: XXXXXXXXXXXXXXXXXXXX
Change bing band boing to your plex URL and port IE. http://xxx.yyy.xxx.xxx:32400
You will now want to get an API key for TMDB and paste that in.
Scroll back up to the top of the file and change The collection_files section. Default from basic to franchise.
and change the overlay_files section from ribon to resolution. 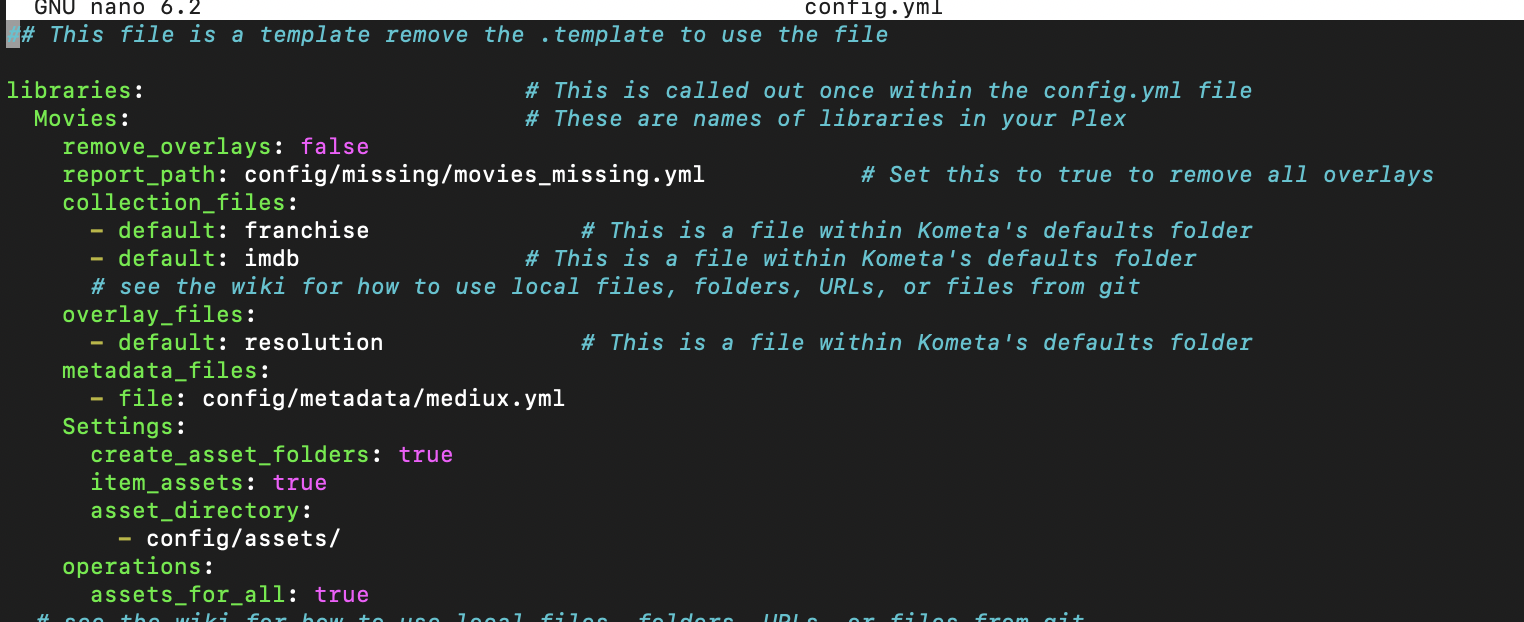
That should be it, Kometa should be up and running and organising plex for you! I would now advise setting up image maid to keep your library clean and optimised!