Backing up Blurays with make mkv and handbrake
Intro
There are many guides online on how to backup your own Blurays, DVD’s etc. But this is a guide based on what I have picked up in the past couple of years doing this. This is a guide for how to convert and backup your own media incase of the dreaded bitrot. Most of this is done on Windows, there are alternates for some of these peices of software for your OS of choice.
Software needed
- MakeMKV
- Handbrake
Lets begin
Note: These handbrake settings will work best with 1080P backups. 4K, your milage may vary.
MakeMKV
On your machine install MakeMKV, This software will be used to rip the blurays. For 4K disks, you will need to find a 4K “Friendly” drive. There are plenty of forum posts online on where to find these drives.
Once installed, open the app.
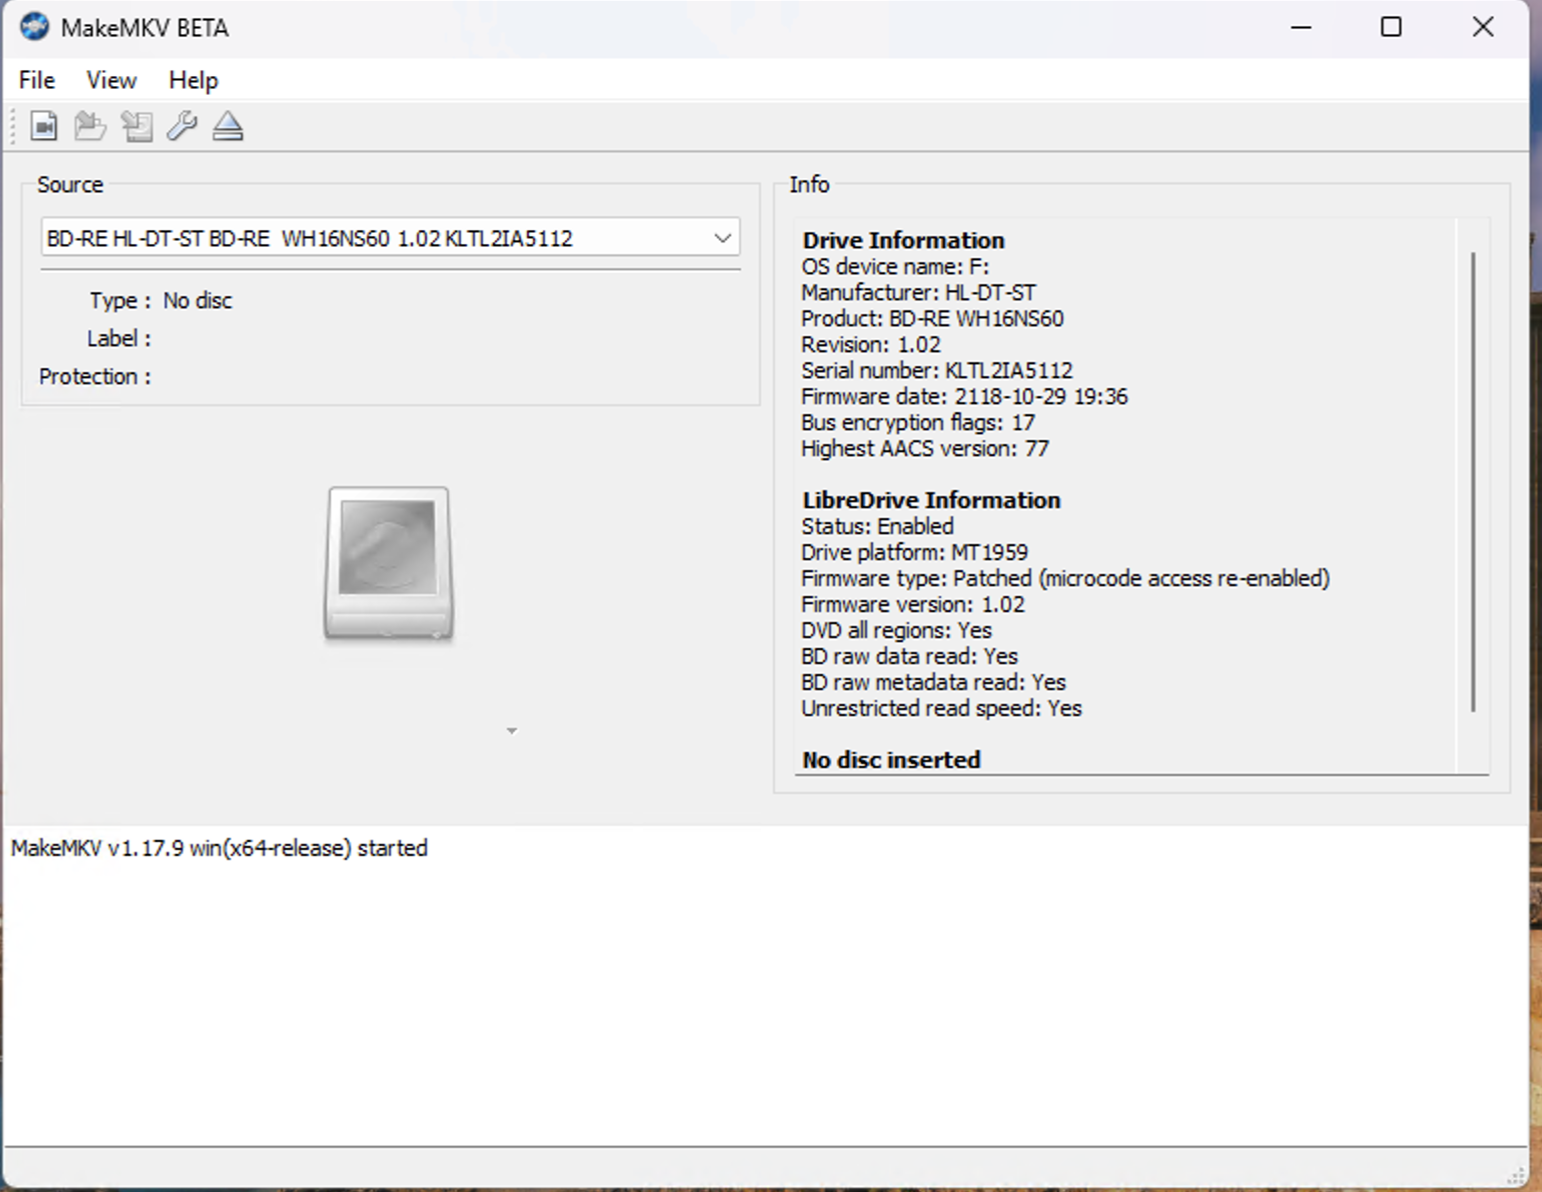 Here you will see the drive attached to your machine. For 4K you will want to make sure your Drive platform is MT1959.
We will want to register the app, Whilst in Beta MakeMKV is free. You will want to grab the key from the forum, it updates every 30 days.
Go to Help and then select register and paste the key in.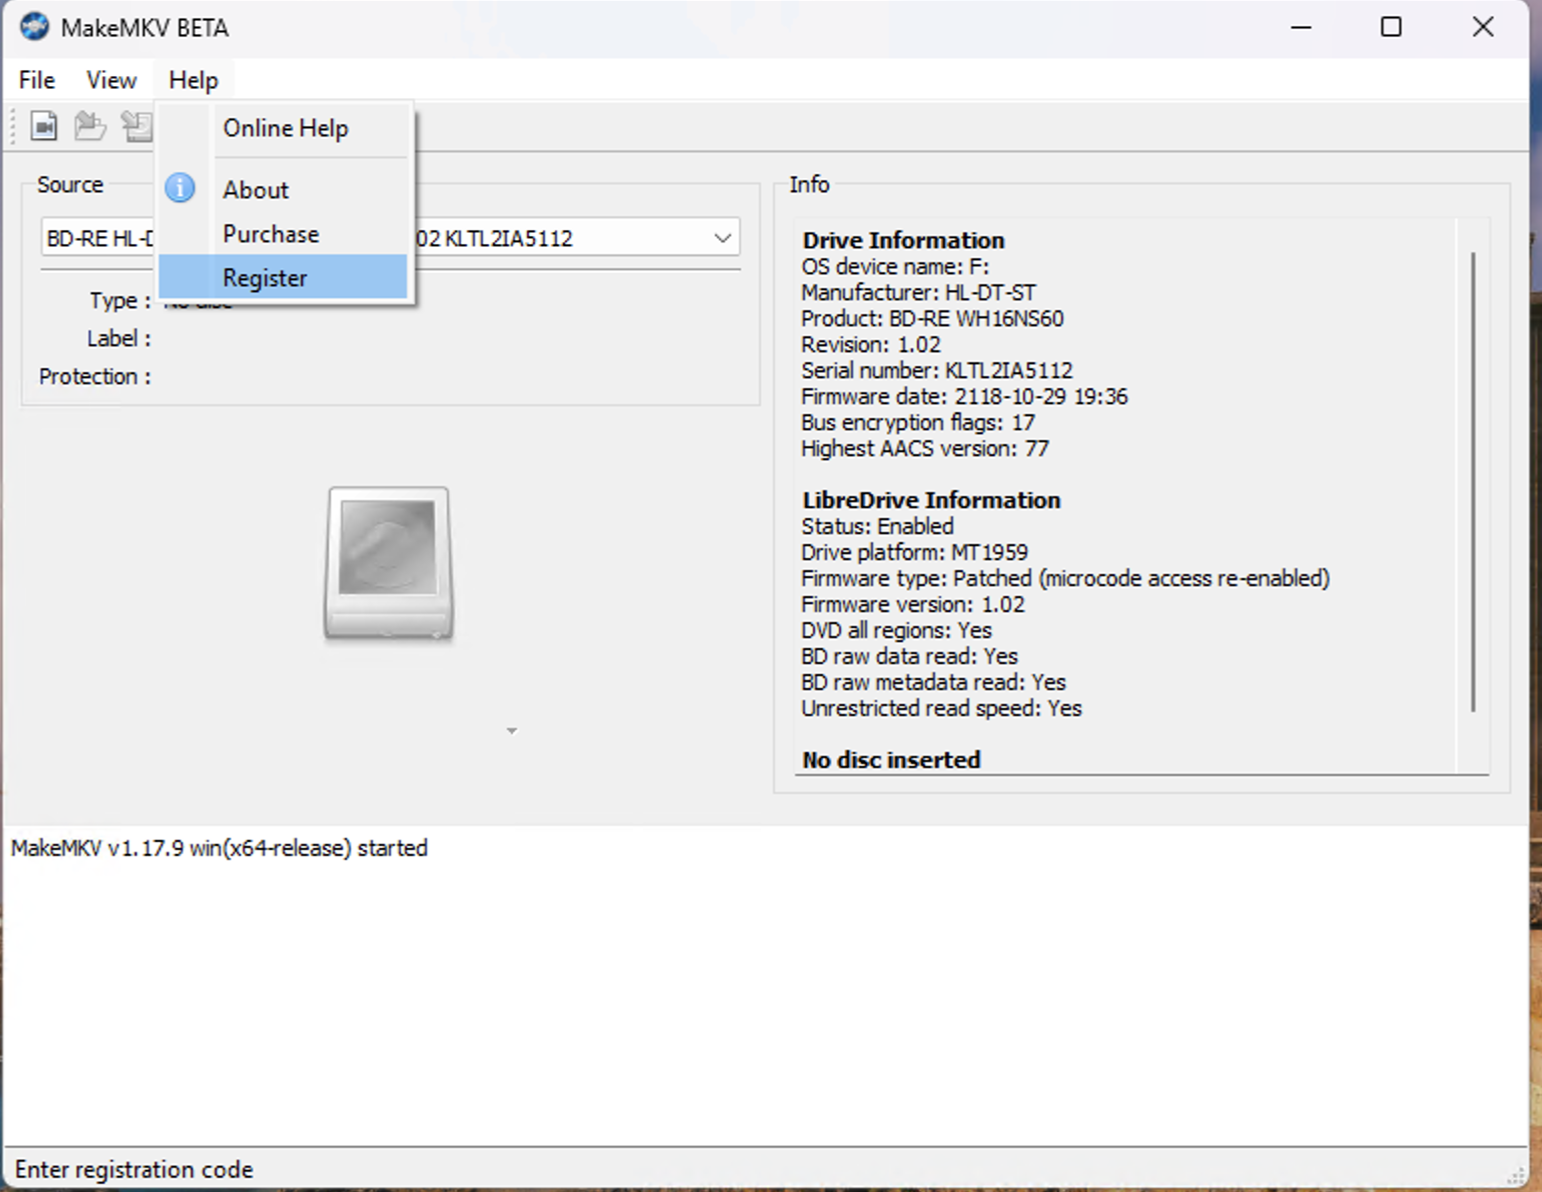 Once completed head into MakeMKV preferences, from there you will want to change the following:
 - Enable Expert mode
- Enable Internet Access
- Select your preferred language and interface language
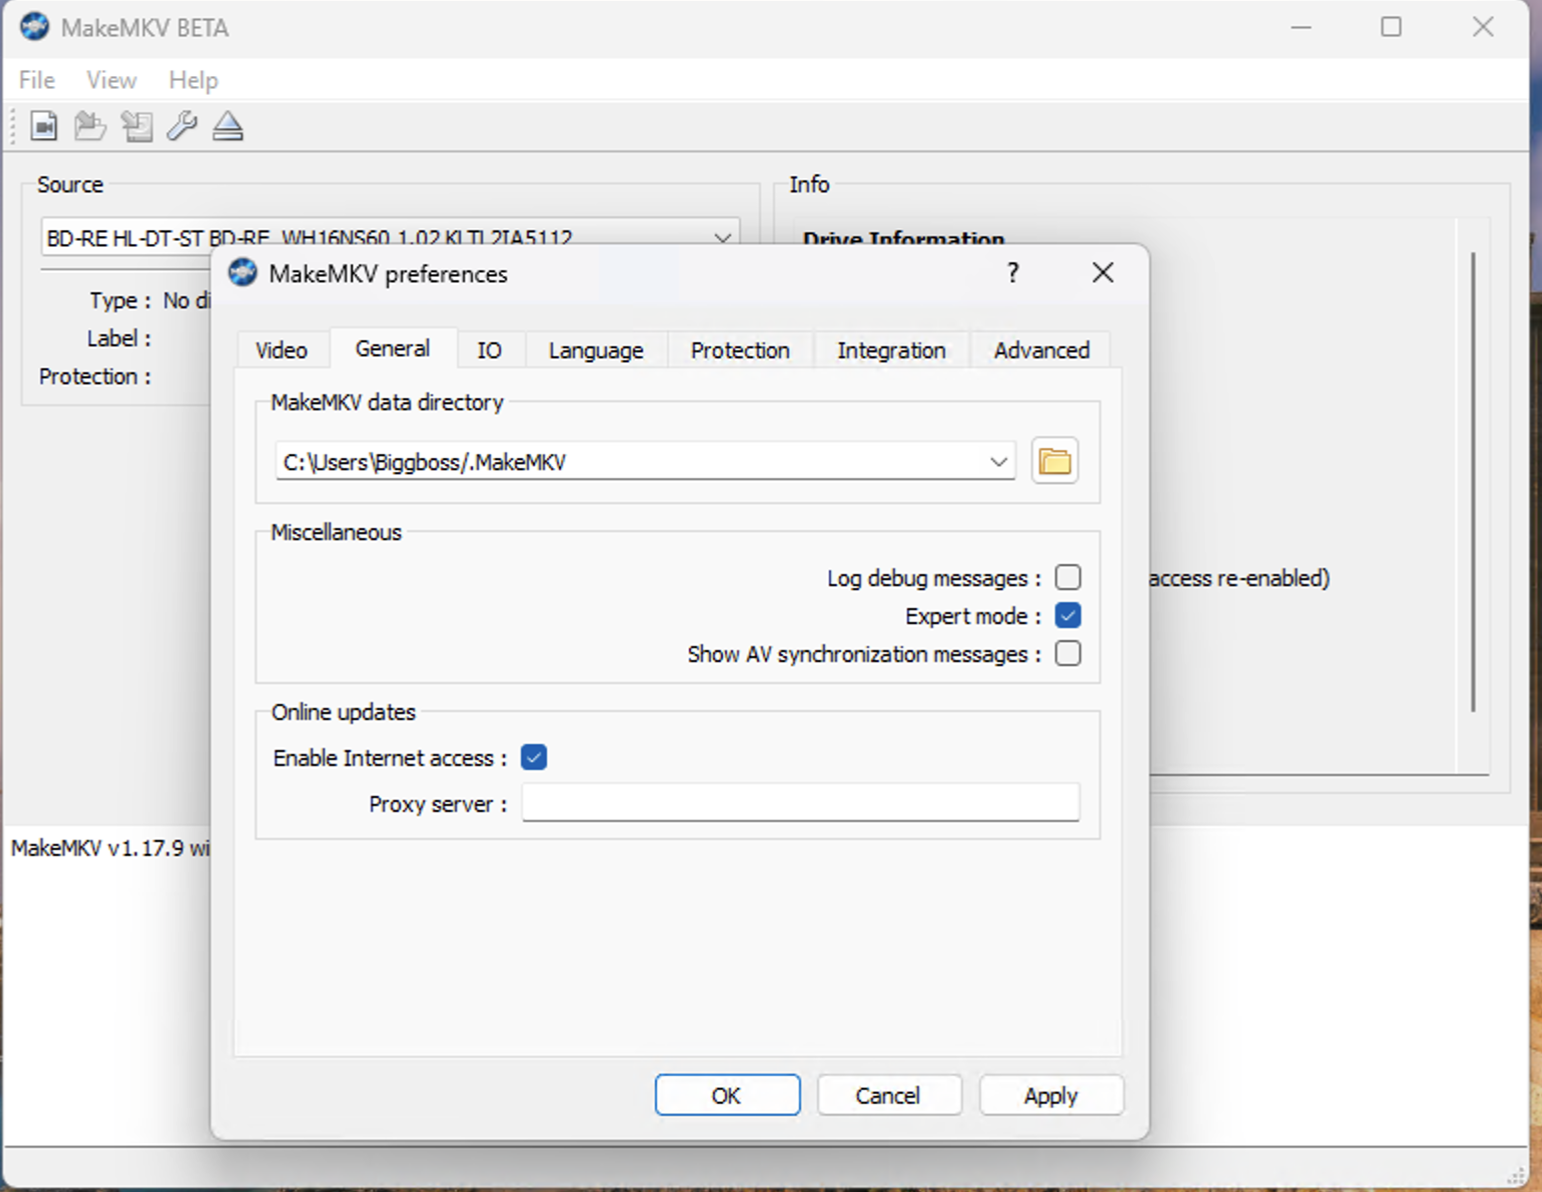
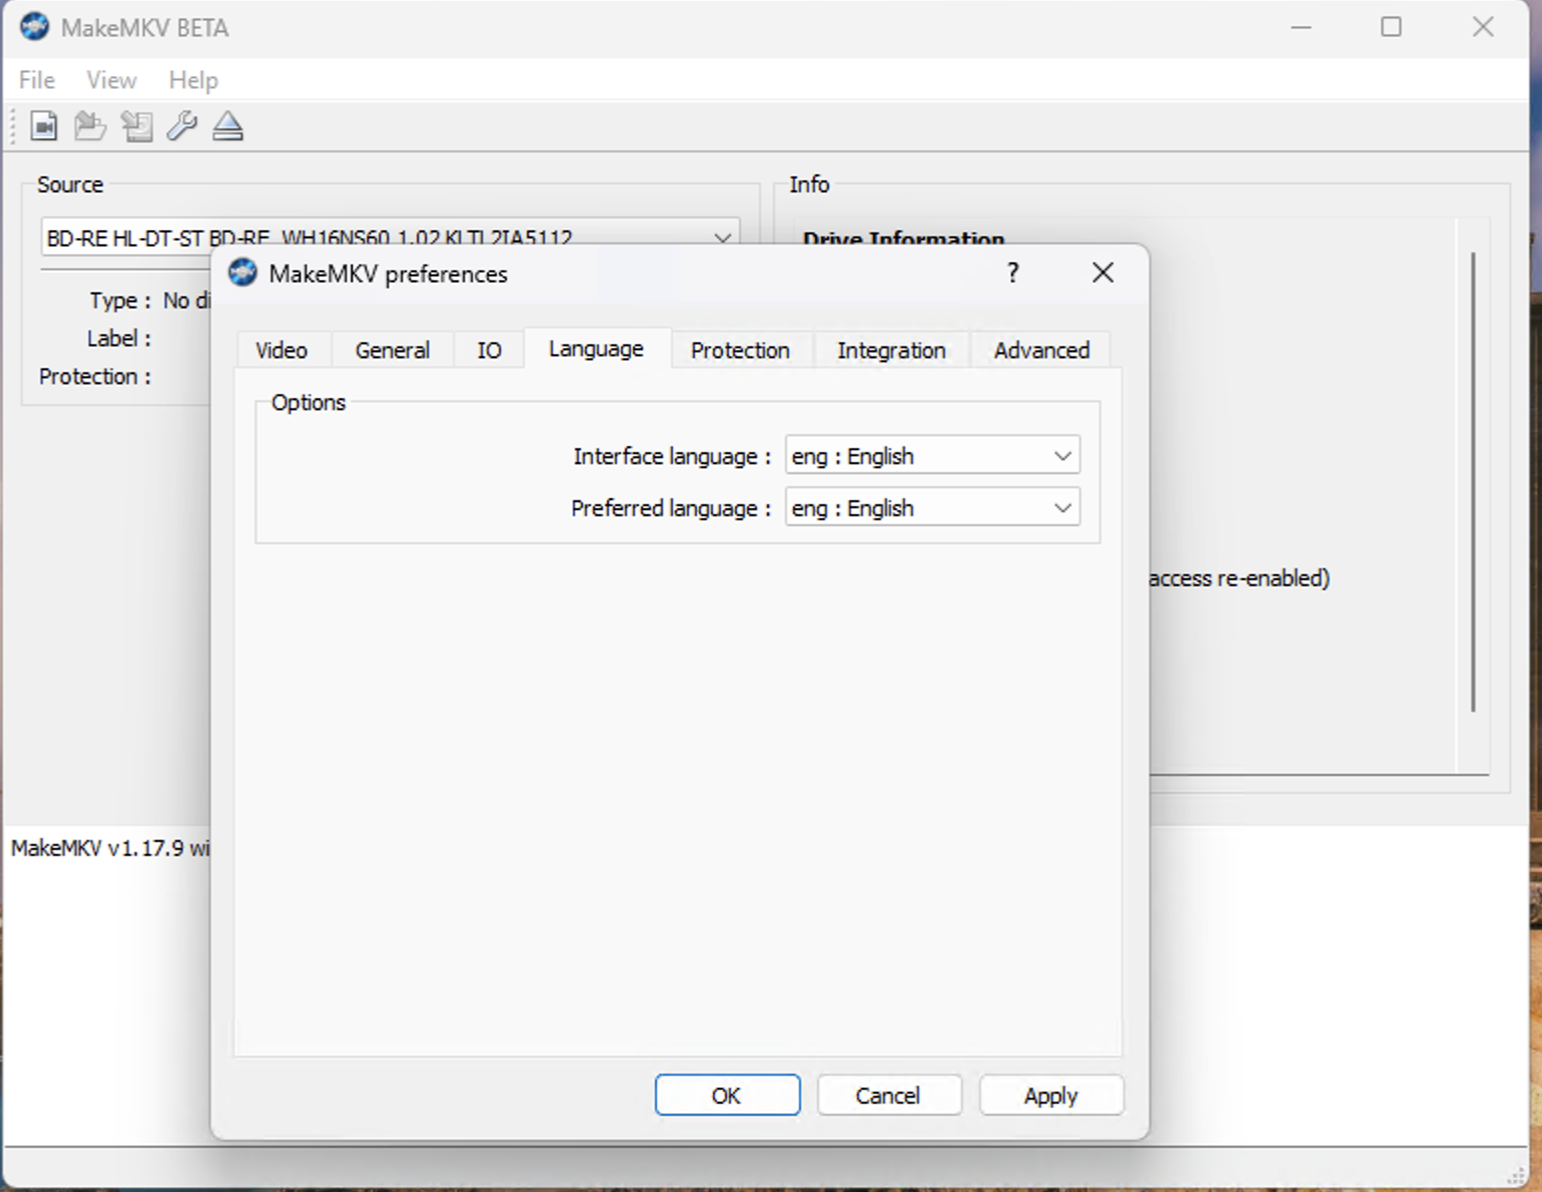 Setting the language etc will mean MakeMKV will auto select the audio tracks for your region so you don’t have to manually change / deselect or remove them later on. Enabling internet access will allow MakeMKV to download certain keys that you need for some disks.
Please look at the forums if you have issues downloading the keys / files.
You are now set for backing up your disks, insert one and you will see that the label field changes from blank to the disks name, open it by pressing the icon of the disk drive on the left side of the application. This will take a moment or two.
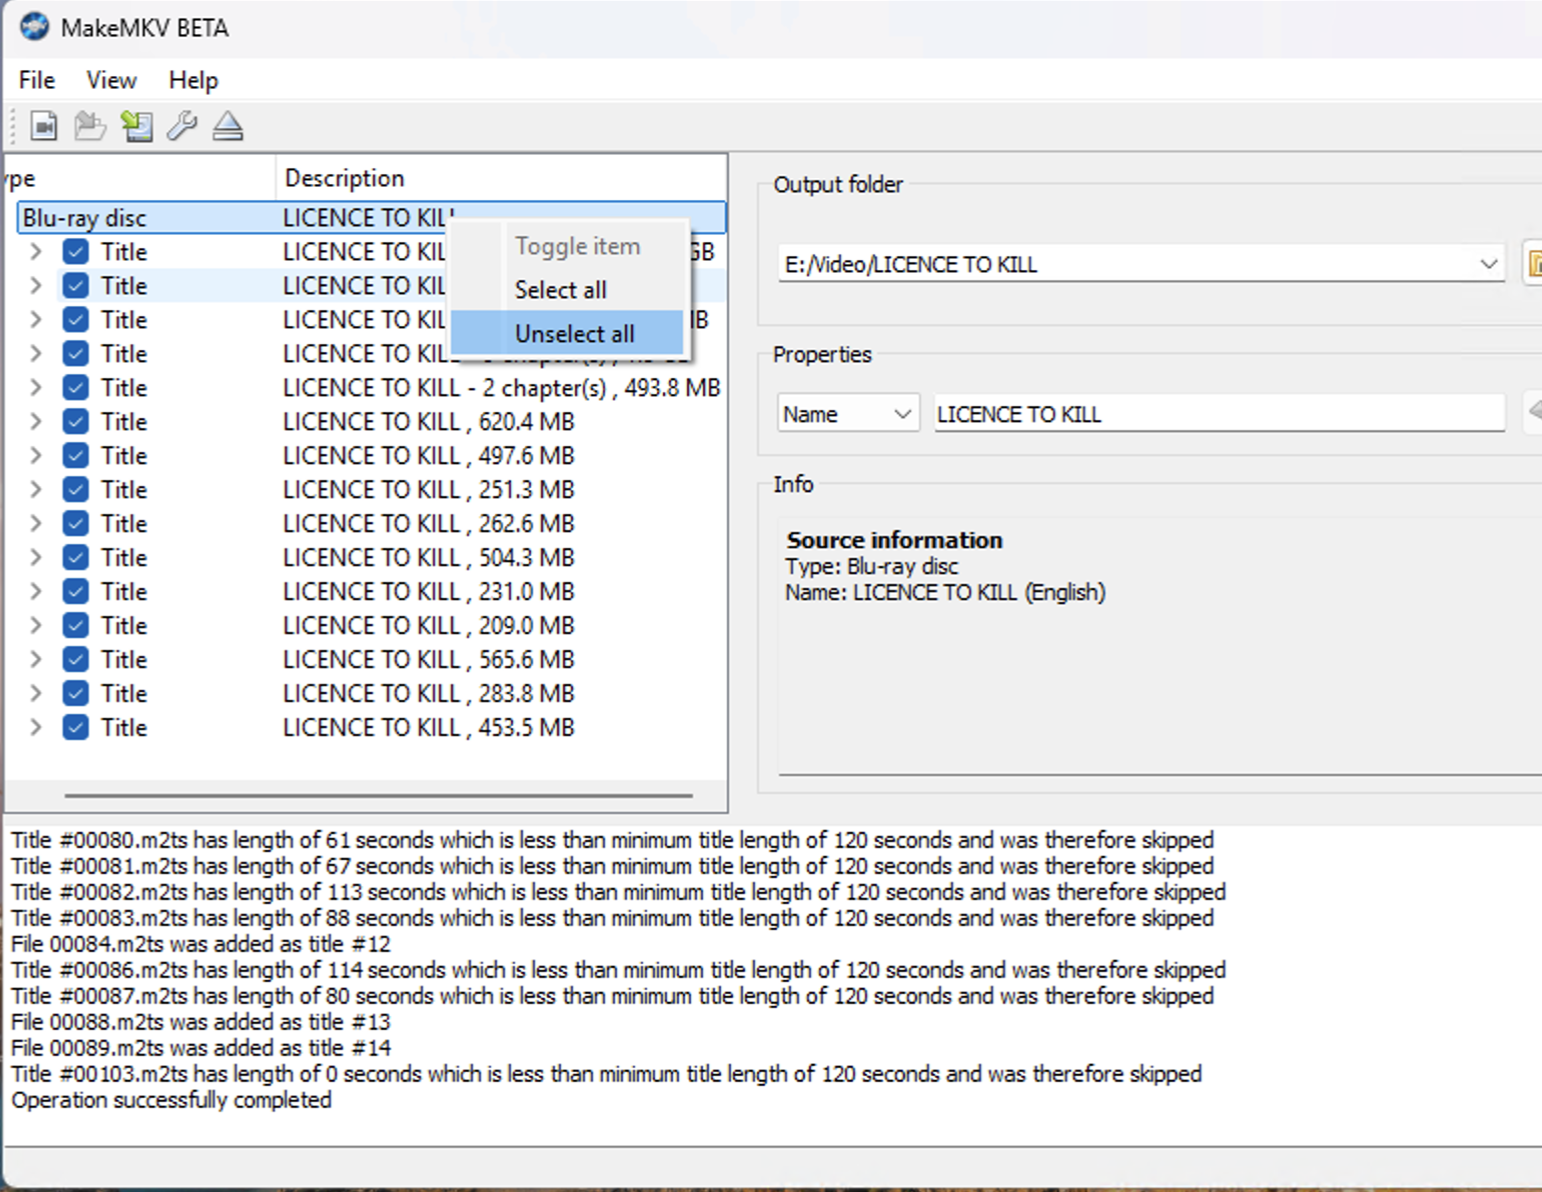 Unselect all tracks (unless you want to keep all tracks), then select the largest track with the most chapters.
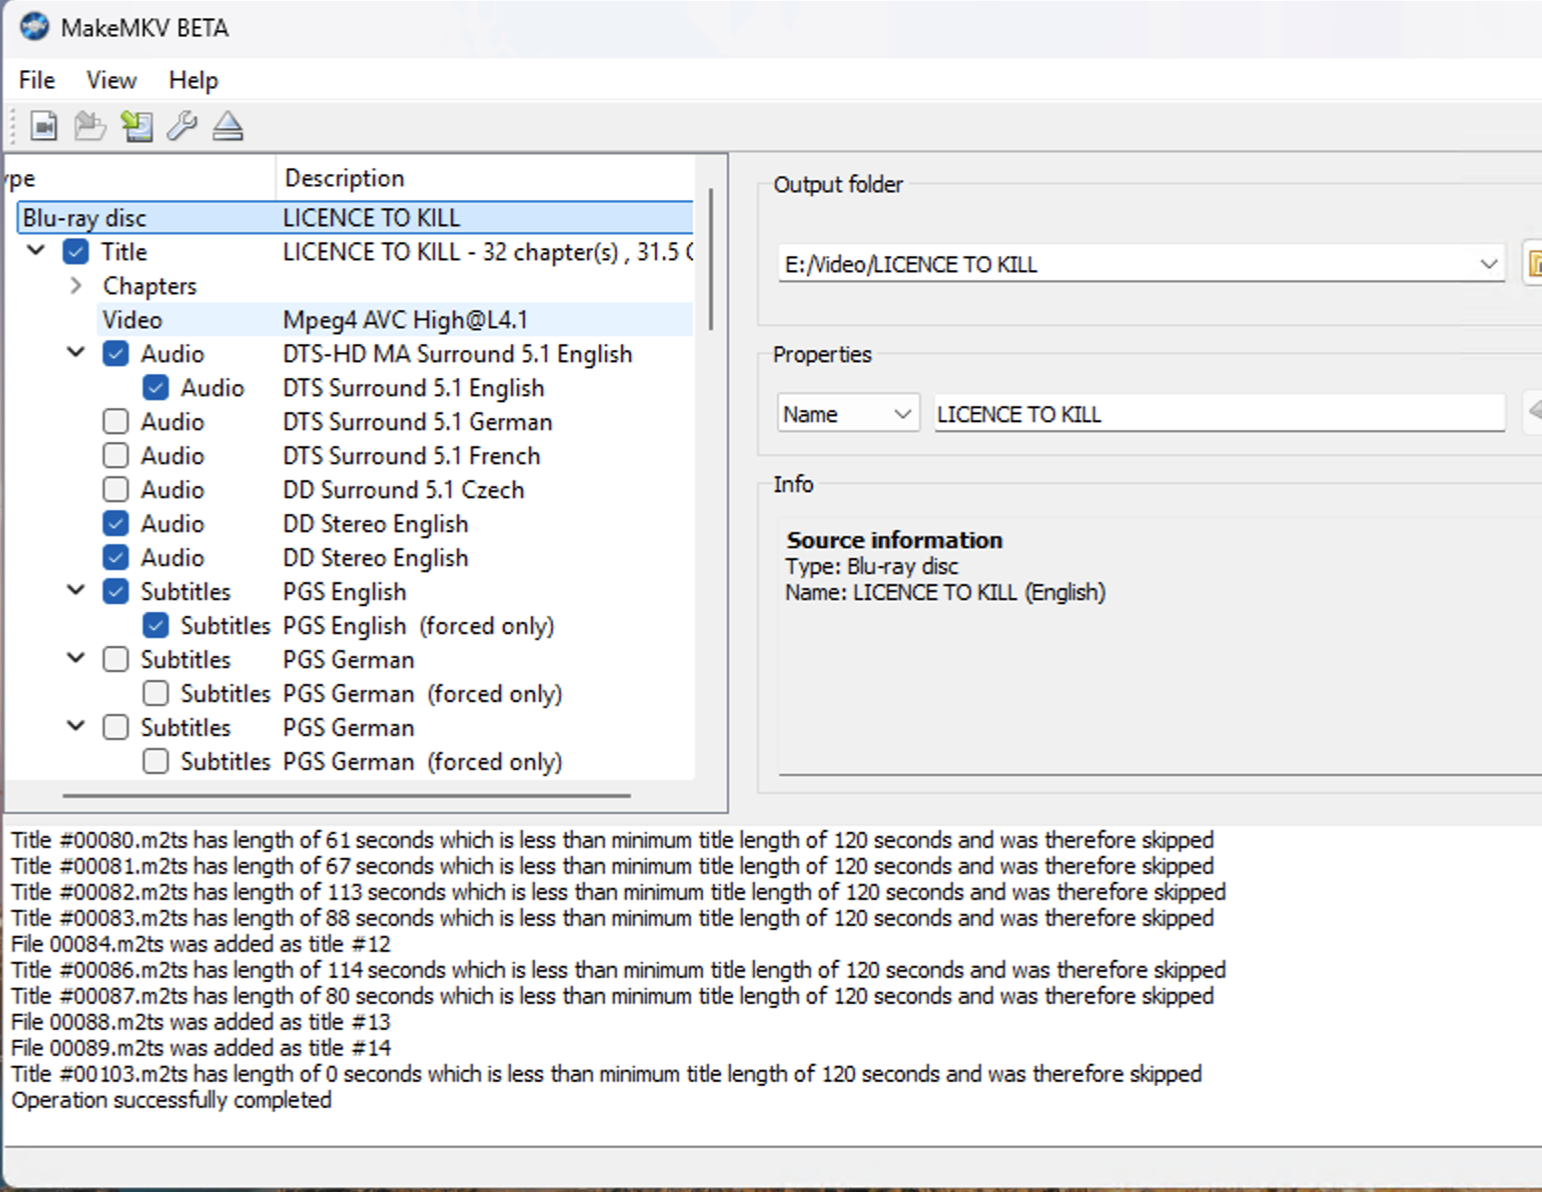 I like to take in all audio tracks and subtitles, especially for those films with multiple languages. Now begin the backup.
Handbrake
Whilst your first backup is running, install handbrake and open the application. Select the “Apple 1080P60 Surround profile”. We will be making changes to this and saving it as a new profile for our own use.
To start off with, open the source to the backup you create earlier.
Select the format “MKV” 
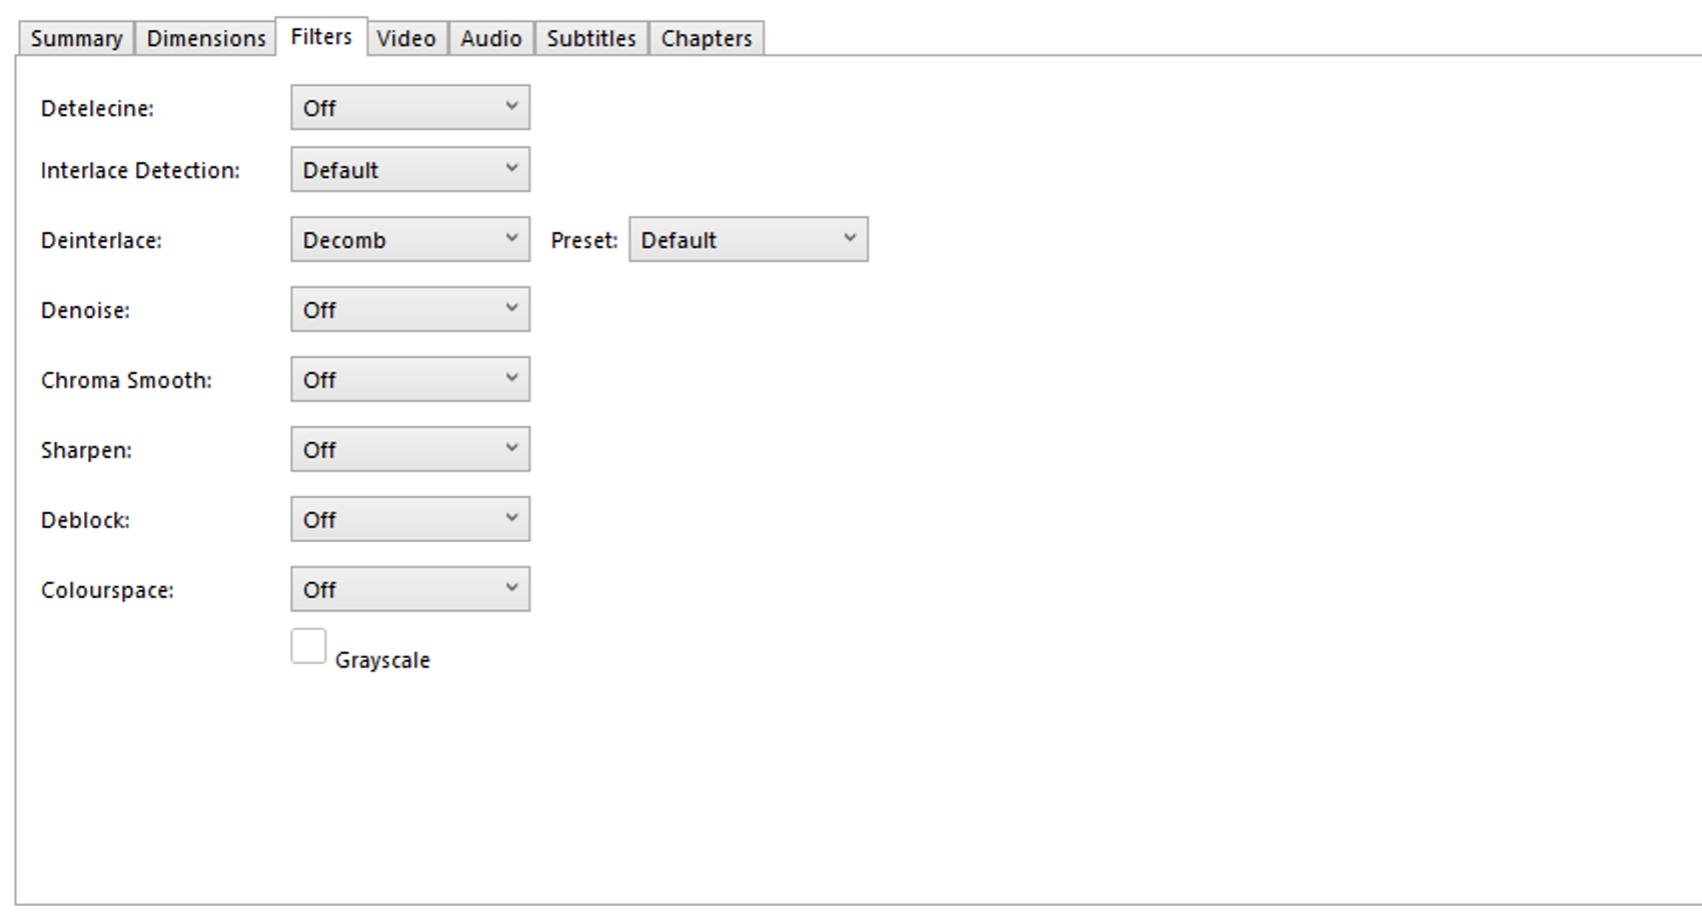
Now go to the dimensions tab and turn off cropping, set resolution limit to 1080P HD and tick optimal size. 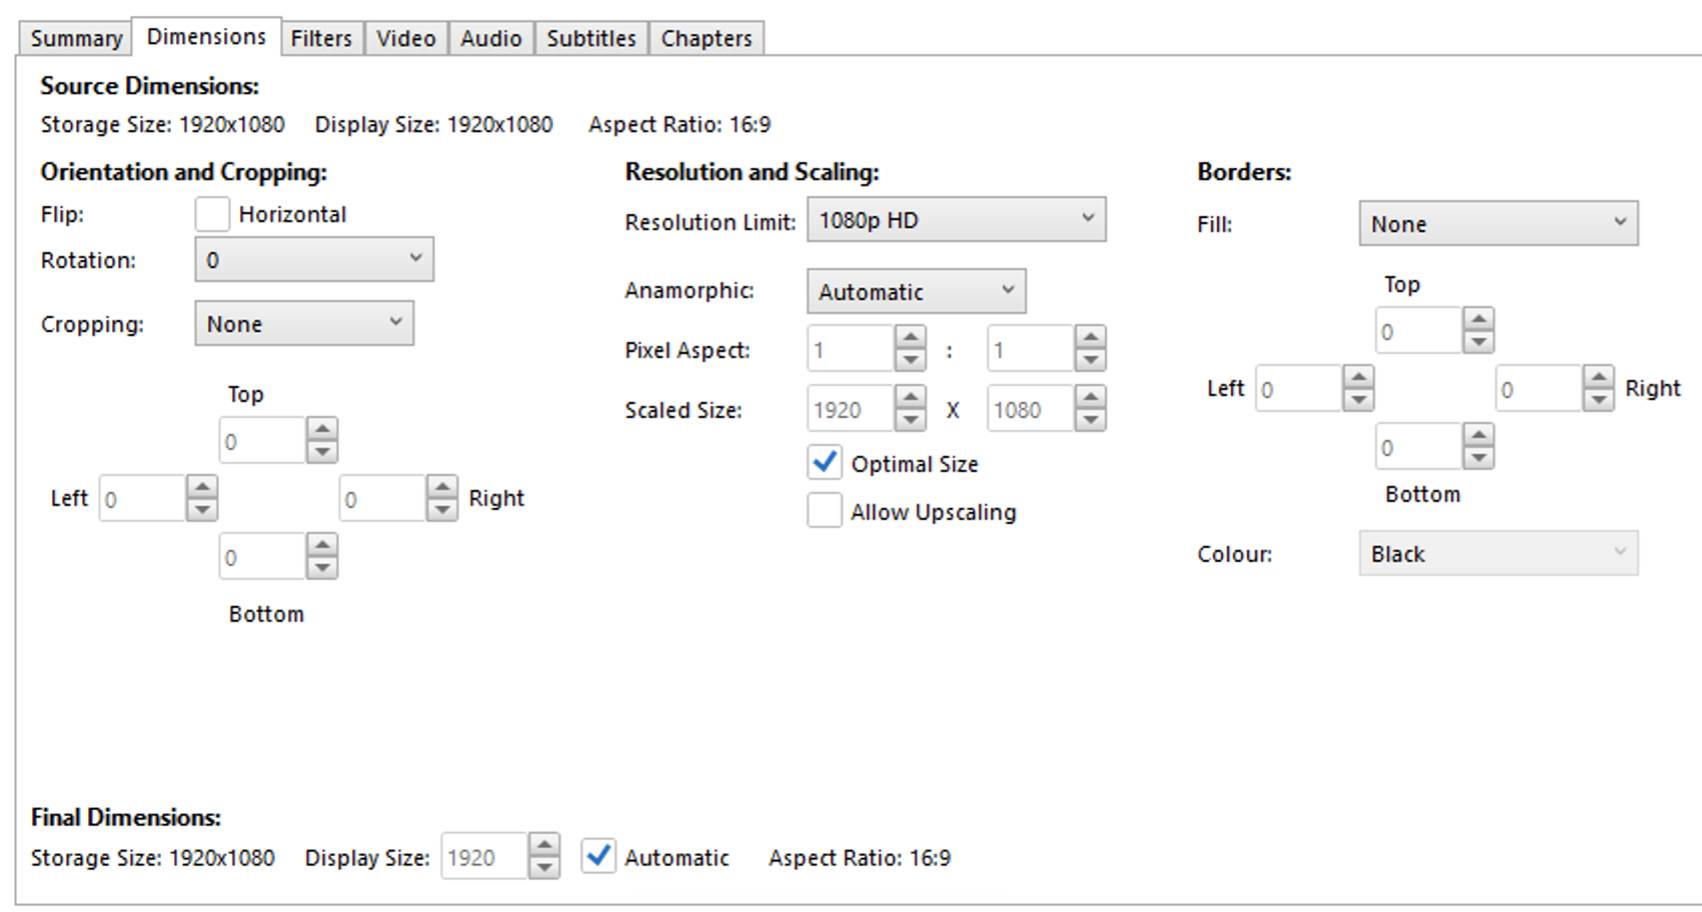 Now head to the filters tab and set the following:
  Head to the Video tab and set the following:
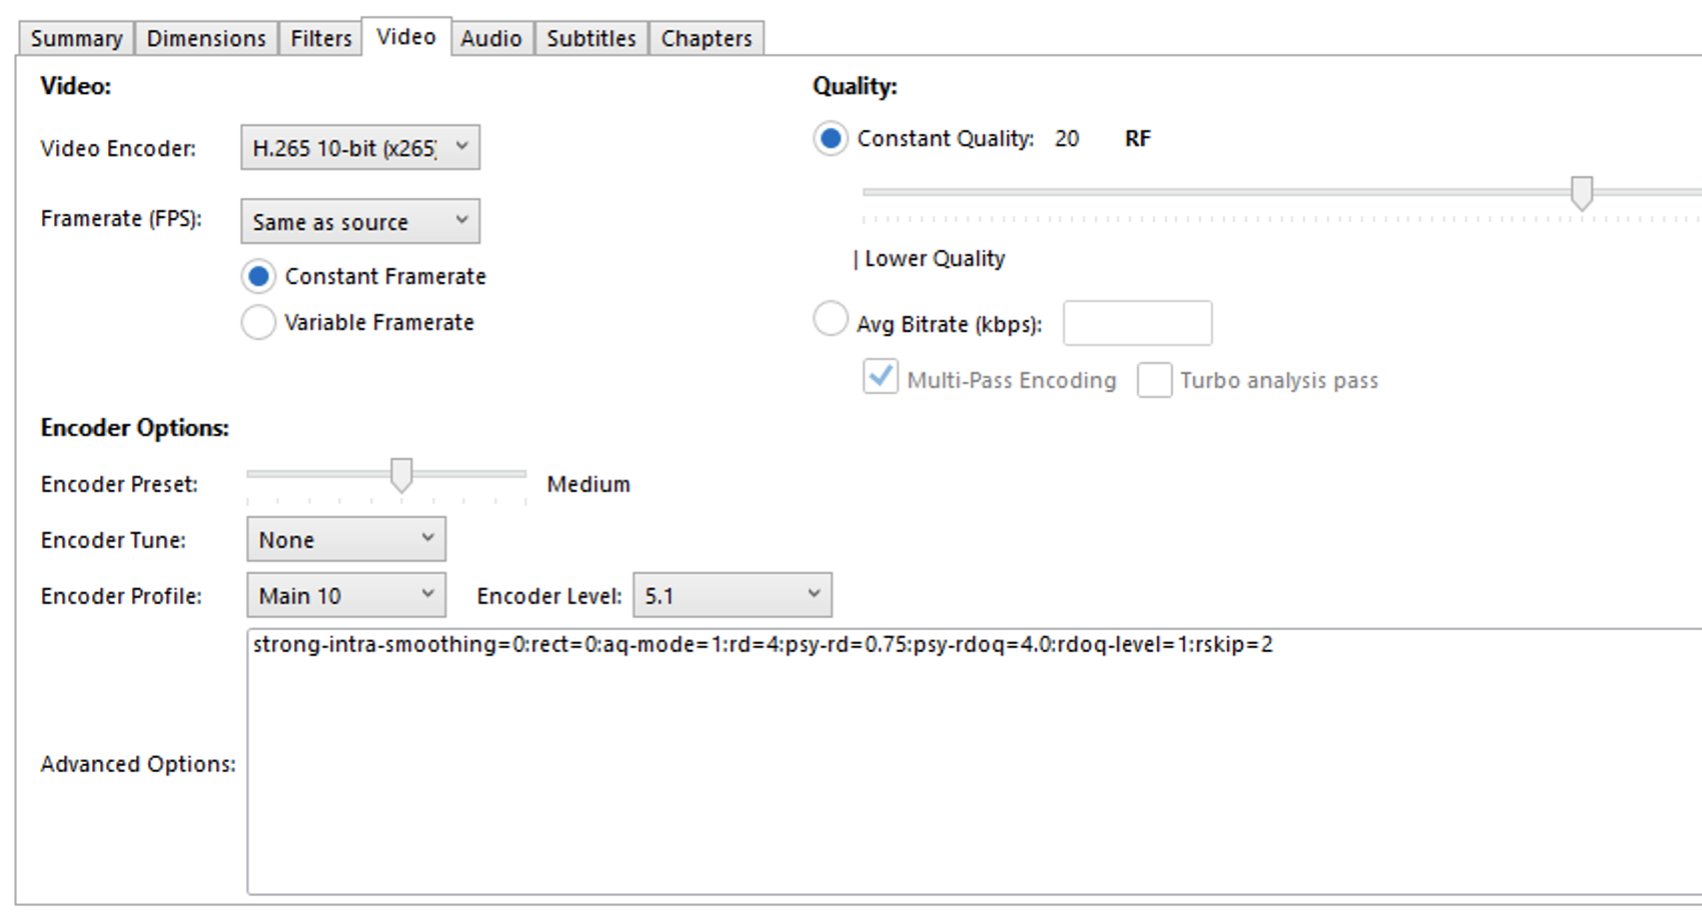
- Set the Video encoder to H265 and framerate to same as source, constant.
- Set the Quality to 20, anything higher and you will start to lose a little too much quality.
- Encoder preset to medium, you can set it to slower if you want a more efficent encode, higher quality for the output size.
- Encoder profile “main10 and level 5.1
- In the advanced options paste the following:
strong-intra-smoothing=0:rect=0:aq-mode=1:rd=4:psy-rd=0.75:psy-rdoq=4.0:rdoq-level=1:rskip=2
Now head to the audio tab: 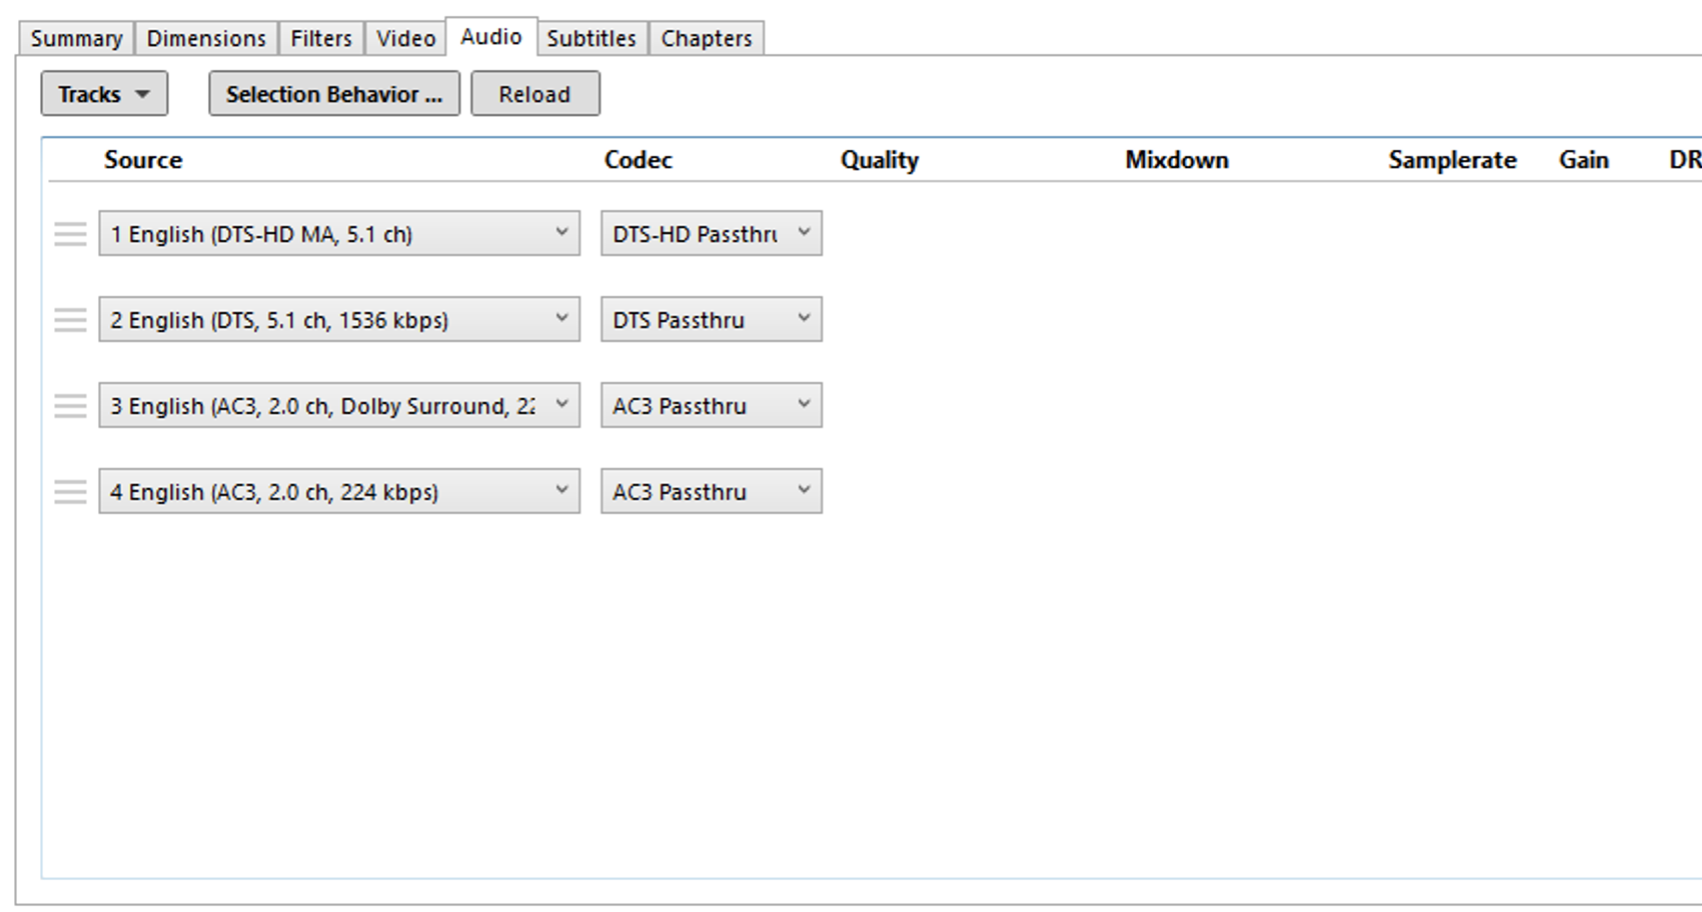 Press the tracks button and then Add all remaining tracks. Then set the codec as passthru - This retains the original audio tracks and does not convert them.
Leave subtitles and chapters as they are. Unless you want to remove them.
Save the preset and name it what you want.
Add the file to the queue and let it run. It will take a long time 3, maybe 6 hours per file depending on the CPU power and cores available.
Now upload to your backup storage or media server of choice and enjoy.